
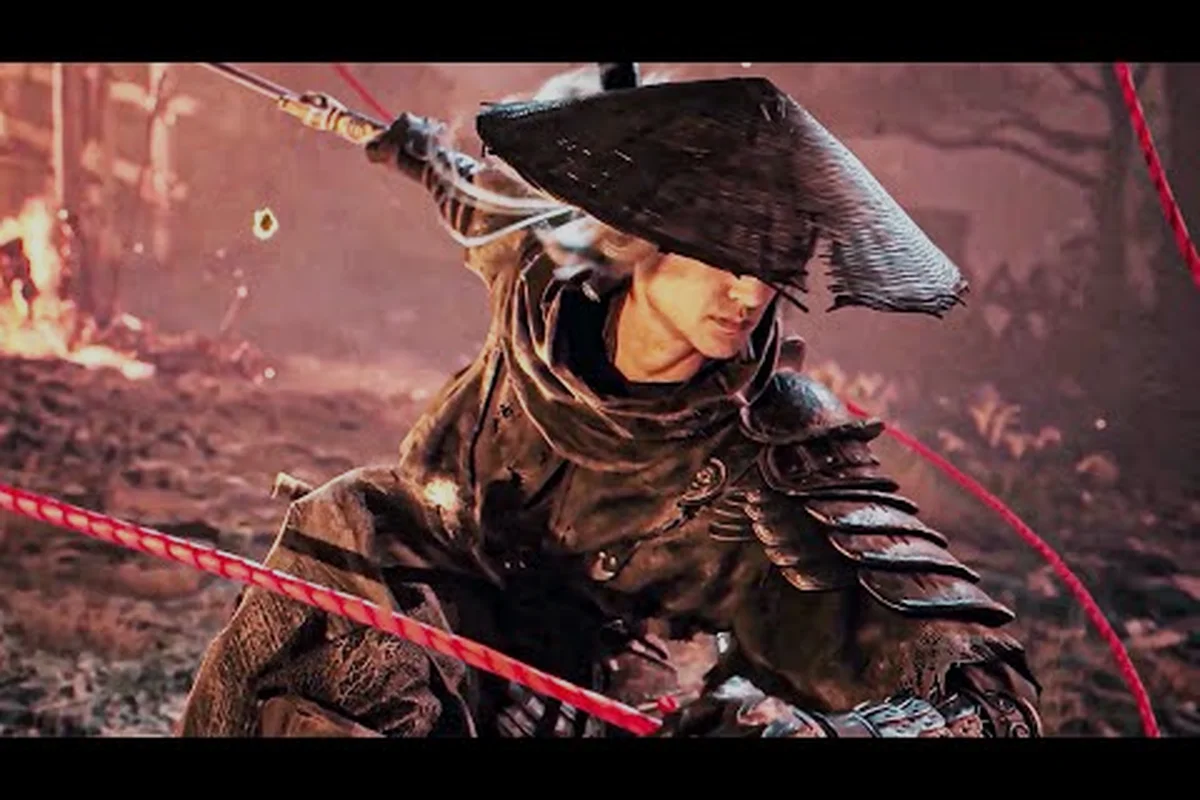
The Phantom Blade Zero Coppermaul boss fight throws one of the early game's heaviest hitters your way — a warhammer-wielding brute named Wan Jun who scatters dirt across the arena with every swing. Careless footwork gets punished hard, but a player who reads the telegraphs and times their parries correctly walks away with rare crafting materials and a hard-won confidence boost. This guide breaks down every mechanic you need to survive the encounter, from his signature ground-slam combos to the hidden punish windows most newcomers miss.
Coppermaul Boss Overview
Wan Jun Coppermaul sits at a pivotal point in the Phantom Blade Zero progression curve — late enough that you should already understand stamina management, but early enough that one sloppy engagement can cost you a run. According to the official Phantom Blade Zero site, Coppermaul anchors a key story chapter and tests whether players have internalized the parry-first combat philosophy that defines the entire game.
He is not a gimmick encounter. Coppermaul fights like a heavyweight boxer who has been hitting warhammers for decades: patient, deliberate, and brutally punishing if you dash in too early. The dirt-scatter mechanic is what separates him from the earlier tutorial-tier opponents, because it transforms the floor from a static surface into a temporary hazard zone. Missing even one parry can snowball into a combo that chunks half your health bar.
Encounter Location and Story Context
Coppermaul guards a narrow mountain pass that connects two of the major story zones. Reaching him requires either completing a side dungeon chain that unlocks the shortcut gate, or taking the longer scenic route through the lower village. The story framing positions him as a former martial arts champion who chose exile over servitude, which explains his stubborn refusal to break posture even when his health drops into the danger zone. Players who want lore context should listen to the optional NPC dialogue in the path leading up to the fog wall, since two of his sentences hint at the deeper Seven Stars conspiracy that runs through the main plot.
What Makes Coppermaul Dangerous
Three things separate Coppermaul from the fodder bosses you've fought before: his stamina recovery is faster than expected for his size, his warhammer reach extends roughly 1.5 times the length of a standard sword, and the dirt he kicks up lingers on the arena floor for several seconds. That lingering dirt is the silent killer — players often dodge a swing cleanly and then walk straight into the residual cloud, which slows movement and interrupts the recovery frame that would normally let them counterattack. If you have not already internalized the dodge and parry fundamentals from the Phantom Blade Zero combat guide, this is the encounter that will force you to learn them.
| Quick Stat | Value |
|---|---|
| Boss Category | Heavyweight / Story-Required |
| Primary Weapon | Massive Warhammer |
| Signature Mechanic | Dirt Scatter (lingering ground hazard) |
| Estimated HP | Medium-high for his chapter tier |
| Parry Windows | Three per standard combo |
| Recommended Level | Chapter 4–5 gear range |
Attack Patterns and Moveset Breakdown
Coppermaul cycles through five core attack chains, and most of the deaths during the Phantom Blade Zero Coppermaul boss fight happen because players either panic-roll the wrong direction or commit to attacks during his hyper-armor frames. His warhammer has enormous reach, which means spacing that worked against sword-wielding opponents will get you clipped here. You want to stay roughly medium range — close enough to punish, far enough that the horizontal sweeps pass in front of you rather than through you.
The dirt scatter is not a single attack. It is a property layered onto three of his five chains, which means you cannot simply memorize one pattern and ignore the others. You have to track both the swing trajectory and the predicted ground hazard at the same time, which is a layered reading challenge unique to this encounter.
Standard Warhammer Combos
His opener is a two-hit horizontal-to-vertical sequence, telegraphed by a pronounced shoulder drop before the first swing. Players using the Phantom Blade Zero parry timing fundamentals should deflect the first hit and then immediately sidestep right to avoid the vertical follow-up, because the second hit has slightly delayed startup that punishes a static parry attempt. A second combo adds a third overhead slam with extended hyper-armor, which is where most newcomers eat a hit because they think the chain is over after two attacks.
The third combo pattern is a delayed thrust — Coppermaul plants his back foot, feints a horizontal swing, then drives the warhammer's pommel forward in a short-range jab. This move has shorter reach than the other chains but breaks guards on a successful hit, so the best response is a backward dodge followed by a quick counterattack during his recovery frames.
Signature Dirt Scatter Attack
Roughly once every forty seconds, Coppermaul will plant both feet and execute a full-body slam that cracks the arena floor and sends a cone-shaped burst of dirt and gravel outward. Based on community testing, the scatter covers about 60% of the visible arena and persists for roughly four seconds after the initial impact. The safest response is to lock onto him and roll backward twice — once to clear the cone, then a second time to reposition outside the lingering cloud. Players who try to parry this slam often succeed on the deflection but then eat the residual dirt damage during their counterattack, which negates the parry value entirely.
| Attack Pattern | Telegraph | Recommended Response |
|---|---|---|
| Horizontal-Vertical Combo | Shoulder drop, 0.6s startup | Parry first hit, sidestep right |
| Three-Hit Overhead Chain | Extended wind-up on swing 2 | Parry first, dodge second, punish third |
| Pommel Thrust Feint | Planted back foot | Backward dodge, punish recovery |
| Ground Slam Dirt Scatter | Both feet planted, full-body wind-up | Roll backward twice, wait out cloud |
| Spinning Sweep (low HP) | Brief pivot on lead foot | Jump or vertical dodge |
Recommended Loadout and Stats
Because Coppermaul rewards precise deflection timing over raw aggression, your loadout should bias toward weapons with fast recovery frames and accessories that boost parry windows. Slow heavy weapons like the Greathammer or Greatsword class will technically work but require near-perfect spacing, which is why most successful attempts documented by players use a medium sword paired with parry-friendly gear. The Phantom Blade Zero beginner guide covers base stat allocation if you are entering this fight underleveled.
Accessories matter more here than in most early boss fights. The Leather Bracer of Seven Stars extends parry window duration by roughly 0.15 seconds, which sounds small but is often the difference between a clean deflection and a chip-damage hit. The Dirt-Step Boots reduce movement penalty while standing in lingering ground hazards, which effectively halves the punishment for misreading the scatter cone. Neither is mandatory, but stacking both turns a difficult fight into a manageable one.
Weapon Choice
A medium-weight sword with a horizontal sweep moveset is the safest pick because it lets you chain two or three attacks during the punish windows that open after each deflected combo. The Twin Crescent Saber and Iron Thread Sword are both popular community picks, though the Phantom Blade Zero build meta shifts frequently based on patches. If you prefer a faster playstyle, dual-wielded daggers can shred his stamina bar during parry chains, but they require tighter execution because the recovery frames are longer.
Consumables and Buffs
Bring at least three healing items and one stamina-recovery consumable. Coppermaul does not have a one-shot kill move at standard difficulty, but his combo chains can eat 40–50% of your health if you miss two parries in a row, so the heal economy is tight. The Bitter Root Tonic is worth crafting because it temporarily reduces incoming physical damage and stacks with your existing armor value. Avoid fire or poison buffs — Coppermaul has high resistance to elemental damage and the buff slots are better used on parry-related accessories.
| Gear Slot | Recommended Pick | Why |
|---|---|---|
| Primary Weapon | Twin Crescent Saber | Fast recovery, horizontal sweep chain |
| Off-Hand | Parry Dagger | Bonus deflection window |
| Accessory 1 | Leather Bracer of Seven Stars | Extends parry window by ~0.15s |
| Accessory 2 | Dirt-Step Boots | Halves ground hazard penalty |
| Consumable | Bitter Root Tonic | Reduces incoming physical damage |
Phase-by-Phase Strategy
The Phantom Blade Zero Coppermaul boss fight has two distinct phases separated by a damage threshold rather than a fixed timer. Phase one covers roughly the first 70% of his health bar and follows the standard pattern cycles described above. Phase two activates once he reaches roughly 30% HP, at which point his aggression increases and he adds the spinning sweep combo to his rotation. His hyper-armor frames also expand slightly in phase two, which means raw trading damage becomes even less viable.
The transition between phases is your single biggest punish window. Coppermaul performs a scripted four-second animation where he slams the warhammer into the ground three times in succession, scattering dirt across the entire arena. Based on community testing, this is the only moment in the fight where he is fully stationary and vulnerable to a full combo, so saving your highest-damage moveset for this transition can shave 10–15% off his remaining health.
Opening Phase Strategy
Start the fight by locking on and circling to his left side. Coppermaul's standard combos favor right-side tracking, which means his swing arcs are slightly wider on his left, giving you a cleaner dodge angle. Land one parry, sidestep the follow-up, then punish with two horizontal strikes before resetting to medium range. Repeat this loop until you have internalized his timing — most players need three to five clean deflections before the rhythm clicks.
Damage Thresholds and Phase Shifts
Around 70% HP, Coppermaul begins mixing in his thrust feint more frequently. Do not panic — the response is identical, but the cadence changes from every fourth combo to every second or third combo. Around 50% HP, he occasionally chains a third horizontal swing after his standard opener, which means you cannot safely counterattack after the second deflected hit. Wait one extra beat and punish the third swing's recovery instead. Around 30% HP, the spinning sweep enters rotation and the phase-two transition triggers shortly after.
Closing the Fight
Once the scripted dirt-slam transition completes, you have one final aggressive window before phase two begins in earnest. Unload your highest-damage combo here, ideally including any charge attacks you have been holding. After that, revert to phase-one discipline but expect faster combo cadence. The fight typically ends within ninety seconds of the phase-two trigger if you have been managing stamina correctly, and Coppermaul's death animation reveals one of the more memorable environmental story beats in the chapter.
| Phase | HP Range | Key Change | Recommended Adjustment |
|---|---|---|---|
| Phase 1 Opening | 100%–70% | Standard combo cycles | Parry, sidestep, two-hit punish |
| Phase 1 Mid | 70%–50% | Thrust feint frequency rises | Same response, tighter timing |
| Phase 1 Late | 50%–30% | Third-hit chain added | Delay punish to swing 3 |
| Transition | ~30% | Scripted triple-slam | Full combo, save charges |
| Phase 2 | Below 30% | Spinning sweep added, faster cadence | Pure parry discipline, no trading |
Frequently Asked Questions
Is the Phantom Blade Zero Coppermaul boss fight required to progress the story?
Yes, Coppermaul is a mandatory story boss. Defeating him is required to unlock the next major area and continue the main questline, though several optional side dungeons branch off from the arena afterward.
What level should I be for the Coppermaul boss fight?
Community testing suggests players in the chapter 4–5 gear range handle the fight consistently. Underleveled players can still win with disciplined parrying, but expect longer attempts and higher healing consumption if you arrive below the recommended threshold.
Can you skip the Coppermaul boss fight like the Red Wraith?
No. Unlike the optional Red Wraith encounter that affects only a later boss's difficulty, Coppermaul sits on the critical story path and cannot be bypassed. Skipping is only possible by exiting the fog wall and exploring side content, but you will eventually need to return.
What is the best weapon against Coppermaul?
Medium-weight swords with fast recovery and horizontal sweep movesets perform best. The Twin Crescent Saber and Iron Thread Sword are both strong picks. Slow heavy weapons work but demand near-perfect spacing because Coppermaul's warhammer reach outranges most heavy-class options.
Does Coppermaul have any elemental weaknesses?
He has high resistance to fire, poison, and lightning damage based on community testing. Physical damage and parry-driven posture breaks remain the most reliable damage sources, which is why buffing for elemental damage is generally a waste of consumable slots in this encounter.
Now that you know exactly how the warhammer swings land and where the dirt clouds linger, take this knowledge back into the Phantom Blade Zero Coppermaul boss fight and turn that mountain pass into your second victory screen — then drop a comment below describing your cleanest parry chain or your most embarrassing dirt-cloud faceplant.